(Warning: fairly long posting with lots of pictures.)
Some of you may remember the post I did two years ago entitled "Timber Framing With My Son." If not, please click
here to review. Included there is an architectural drawing of the sauna for which we prepared timbers during the class on timber framing that we took in Grand Marais, MN back then. Will had made plans to build a sauna on the property that he and Sandy own within the Superior National Forest, and his chosen construction style was a timber-framed building. This year, Will and Sandy made plans to erect the building, and Kathie and I were invited to assist in that project. Because I helped make the timbers two years ago, I was very excited to have a chance to assist in putting the structure together.
Will worked during the spring and earlier summer building a rock foundation to support a set of timber sills and floor joists. When Kathie and I arrived, Anders showed me that work. I was impressed with how solid this base was. The setting is a sheltered nook enclosed within the forest. The sauna will look out toward their lake just down a slight hill and not too far to run to the lake after baking in the sauna for awhile.
After showing me the foundation, Anders asked if he could take my picture with my camera. I think he did a pretty good job of capturing my happiness at being with him and the excitement I felt about the work we were going to do over the next several days.
Later, Anders was playing with his dad's chain sawing helmet, and of course, I could not resist getting a picture of that.
Kathie and I stayed at a motel in Grand Marais and drove out to the project site each day. Will, Sandy and Anders stayed on site in the tiny cabin Will built on their property a few years ago. The first actual day of work involved finishing up the toe-nailing of some of the floor joists.
Next, Will put the ladies to work planing some of the faces of selected timbers, namely the interior faces of posts and knee braces. This will give the sauna's two rooms a more finished look. There will be a front porch with an entry into a changing room, which has a door leading to the actual sauna room. Until Will and Sandy can build a larger timber-framed cabin on the property, their intention is to use the sauna temporarily as a small cabin for their stays at the lake. The one they have is just too small.
Meanwhile, I fit sheets of treated plywood to the base of the sauna to make a floor. Later, Kathie and Anders helped me nail them to the sills and joists. The open area on the right will be the porch and will have deck boards instead of a regular floor. During the project this past week, we covered it temporarily with chip board and other scraps so that we could stand on it to work.
Will used an old-timey adze to put decorative curves in the ends of the plates (or beams) that form the roof lines. He did the same with the eave-ends of each rafter.
Many of the timbers (plates, posts, and girts) had to be bored to accept the 3/4" oak pegs which secured the various joints between posts, plates and knee braces. Will put me to work doing that job, so here I am measuring locations for holes. In the end, I must have bored out about 100 holes or more. I now have "Popeye arms." Anders helped.
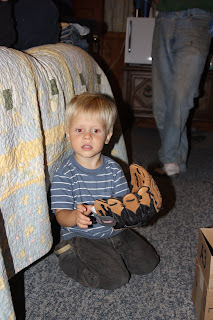
We celebrated Anders' birthday a few days early, while we were there. This shot was taken in our Grand Marais motel room/cabin after Anders had opened his first gift, which is the mandatory, Grandpa-supplied baseball glove. I had also made a baseball bat for him, which you can see in the second shot. I even managed to woodburn "AWD Slugger" onto it without making a serious mistake.
The next day, we were back to work in the rain. Will is using a draw knife here to clean up some of the curves in the ends of the top plates.
Finally, after all the preparation (planing, shaping and boring), it was time to begin raising the structure. I was anxious, as I'm sure Will was also, to see if the pieces fit together as they were supposed to. This was a little like having a big set of Lincoln Logs and hoping we had made them properly more than two years ago. In this shot, we have joined the pieces forming one of the two outside walls. This mostly involves inserting tenons into mortises and then pulling everything together with ratcheted straps. After joining, Will took care to insure that things were square. When not, we would pull the assembly back apart, and Will would make small adjustments with a sharp chisel or slick to get a better fit.

The holes that I had previously bored were through the mortises, but the inserted tenons could not be bored until they were seated and aligned within the mortises. So some additional boring occurred at this point, and then oak pegs were driven into the holes to secure everything. No nails, screws or bolts in a structure like this one! With a little help from his dad, Anders had the honor of driving in the first peg. His dad labeled the spot for future historians to discover.
Now it was time to set the assembled wall upright. Will had rigged a block and tackle to a nearby tree so that he could pull it up while the rest of us guided it into place. Then it was temporarily braced with some 2x4s. Will gave it a few extra taps with a sledge hammer to settle the posts onto pegs we had previously put into the floor to help position each one.
More holes! I located the positions on the floor for each of the post pegs and then bored holes in the floor and into the bottom of each post for those pegs.
Anders wanted to try the electric drill too, now that he was familiar with a brace and bit. He liked making holes. Will has a generator at the property (no electricity otherwise!).
The two outside walls are now in place.
Each of these walls is joined to a series of center posts with timbers called girts, so our next task was to add the three center posts, girts and companion knee braces.
At the end of the first full day of assembly, we all felt pretty proud of ourselves. Kathie too, but someone had to take the picture!
On the following day, we had to tip the remaining wall out slightly, holding it from falling over with straps. This was done so that we could add the girts and knee braces on that side of the center posts.
Here is the structure with all of its walls and bents in place. A bent is essentially a wall that is perpendicular to the outside walls. Walls go side to side, and bents go front to back. The only things remaining at this point were more pegs, a final top plate, and the rafters.
Sandy worked on pegs.
Anders supervised from a good supervisory position.
There was some admiring of the work done thus far.
The final step, prior to the addition of the rafters, was to lift the last top plate onto the top of the center posts. Will pulled this up using the block and tackle, while the rest of us pulled it over onto the structure. Then he and I boosted it up onto the center posts, positioning various knee braces in the process.
Sometime not long after this, Kathie took a tumble while pounding a knee brace into place. She bumped her head pretty hard, so we all were distracted from taking any more pictures just then. She's fine now, although she had quite a headache for awhile. As a result, I didn't get any pictures of the structure with its rafters added. Will and Sandy may post some of those shots on their blog. Except for Kathie's tumble, this was all a huge amount of fun for me.
Oh, one last thing, and to show that Kathie really is OK...the World's Greatest Donuts shop is in Grand Marais, so we may have been guilty of stopping there several mornings. This picture was taken the last morning, just before we drove back to our place in WI. Yes, these really are the best donuts in the world, no doubt about it, no debate, end of story.


